 |
|
Click to see the shelves. |
If you look around in the
room you're in right now you'll see that the middle of your field
of vision is where you can only see the front of
objects, you don't see the tops or bottoms of objects,
this is where the "horizon" line would be. Take for
example a stack of shelves. Notice that you only see the
front edge of the middle shelf, but you can see the
undersides of the top shelf and the top side of the
bottom shelf. This is showing that, in this photo of
shelves, the second shelf from the top is
the "horizon line" and that the shelf above this line
appears to be angling down in back and the shelves below this
line appear to be angling up in back. In order to accurately do
a drawing of these shelves, you would have a lot of
horizontal lines that would represent the front edge of
the shelves, and
also you would have to draw a lot of angled lines that
angle both up and down depending on if they were above
the horizon line (angle down) or below the horizon line
(angle up). Also notice that the farther up or down you
get from the horizon line, the sharper the angle is.
 |
|
Click to see the image that you'll
draw |
 |
 |
|
Drawing the beams. |
 Get ready to do a drawing by putting a new
sheet of paper on your drawing board and sharpen your
pencil. Put the paper vertically on your board because
that's the orientation of the photo. You'll be drawing
the image to the right, which show three beams in a
ceiling. Click the photo to see how large it
looks for you. Is your monitor big enough to have the
picture open and read this page as well? If not, I
suggest you print the photo out. Get comfortable with
your drawing board in front of your computer so you can
draw and read as well. Get ready to do a drawing by putting a new
sheet of paper on your drawing board and sharpen your
pencil. Put the paper vertically on your board because
that's the orientation of the photo. You'll be drawing
the image to the right, which show three beams in a
ceiling. Click the photo to see how large it
looks for you. Is your monitor big enough to have the
picture open and read this page as well? If not, I
suggest you print the photo out. Get comfortable with
your drawing board in front of your computer so you can
draw and read as well.
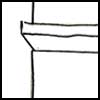
 To
start, you want to draw horizontal lines that will
represent the front edge of the beams. Also, draw a
vertical line on the left side that will represent where
the wall meets the ceiling. To
start, you want to draw horizontal lines that will
represent the front edge of the beams. Also, draw a
vertical line on the left side that will represent where
the wall meets the ceiling.
 Next,
lets draw the two visible back sides if the top and
bottom beams. If you look at where the top beam meets
the ceiling, the distance from the front of the beam to
the back is slightly more than the width of the beam. So
when you draw the line for the back of the beam, draw
the line a little more than the the width you drew the
beam. Start that line right at the vertical line you
drew. Looking at the bottom beam, there looks to be
about two and a half times the width of the beam to the
back of the beam. So start that line at the vertical as
well and draw a line going to the right of the paper. Next,
lets draw the two visible back sides if the top and
bottom beams. If you look at where the top beam meets
the ceiling, the distance from the front of the beam to
the back is slightly more than the width of the beam. So
when you draw the line for the back of the beam, draw
the line a little more than the the width you drew the
beam. Start that line right at the vertical line you
drew. Looking at the bottom beam, there looks to be
about two and a half times the width of the beam to the
back of the beam. So start that line at the vertical as
well and draw a line going to the right of the paper.
 Take
your ruler and put it a little left of the horizontal
line and mark the edge of the beams where they meet the
wall. Take
your ruler and put it a little left of the horizontal
line and mark the edge of the beams where they meet the
wall.
 The
last step is to connect the the lines for the back of
the beams to the lines representing the front edge of
the beam. Then I freehand darkened up the lines. The
last step is to connect the the lines for the back of
the beams to the lines representing the front edge of
the beam. Then I freehand darkened up the lines.
 |
|
It's all in Perspective! |
PUTTING IT ALL IN PERSPECTIVE
So what's the point of learning all this one and two
point perspective jibba- jabba? It's so that when you
draw, your drawing don't turn out looking flat. It's so
that you understand that things further away from your
eye look smaller than things closer to your eye. Let's
say you were called to create the simple drawing on the
right. If you drew all the telephone poles the same
height, and the road didn't come to a vanishing point on
the horizon - even this simple drawing wouldn't look
right to your eyes. But since perspective is used in the
drawing, the smaller telephone poles appear to be
further away from your eyes than the larger telephone
poles. Once you are able to create the illusion of depth
in your drawings by using perspective - you'll be one
step closer to being able to say - "I can Draw!" |
